
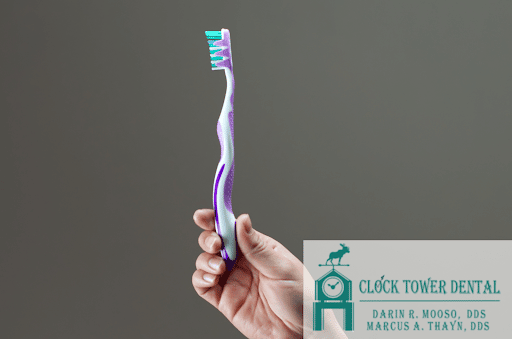
We all know that proper oral hygiene necessitates that we take good care of our teeth and gums, but did you know that it also means taking proper care of your toothbrush? That’s right, the tool that we use each day to maintain our pearly whites also needs a little TLC every now and then.
Proper toothbrush care may not be something you think of often, if at all, but a proper toothbrush is critical in maintaining our oral health. Our guide to taking care of your toothbrush will provide you with the tips and tricks to make sure that you’re keeping both your toothbrush and your teeth healthy and clean!
Watch Your Pressure
There’s a common belief surrounding oral hygiene that states that the harder you brush your teeth, the cleaner they become. While the idea of using elbow grease to clean better certainly applies to many situations, this simply isn’t true when it comes to our teeth. Your teeth are probably strong enough to handle a good scrub, but too much pressure can damage your gums.
Brushing too hard can damage your toothbrush bristles along with your gums. The force put on the brush can cause the bristles to become bent, which means that your toothbrush will become ineffective at doing its job.
You should glide your brush over your teeth with a pressure of up to 150 grams. Use a kitchen scale to practice your pressure distribution, and remember to never smash the bristles into your teeth and gums.

Rinse Before and After Use
Before you begin brushing your teeth, give your toothbrush a rinse under tap water. This will moisten the bristles and help to clean off any debris that may have accumulated throughout the day.
Brush your teeth like usual, and finish your routine by rinsing your toothbrush in hot, running tap water once again. A thorough rinse helps to keep your toothbrush free of food particles, toothpaste, blood, saliva, and bacteria that may have accumulated during the brushing process.
Wipe your finger over the brush and shake it to remove excess water, then leave it to air dry in an upright position. You want to make sure it is completely dry before you cover it, as retaining moisture can make it a breeding ground for bacteria.
Storage
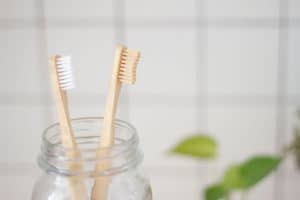
Once you are finished, store your toothbrush in its toothbrush upright in a toothbrush holder. Make sure that the holder allows air to circulate around the toothbrush head. Avoid using a closed container toothbrush holder, as bacteria thrive in these environments.
Make sure to keep your toothbrush away from the toilet, as particles released when you flush can remain in the air for up to 2 hours. If your toilet and sink share the same room, store your toothbrush below the sink, uncovered and in an upright position.
The Sharing Situation
Sharing a toothbrush with a family member may seem like a cost-effective way to clean your teeth, but it’s just not something you should do. As you brush your teeth, blood can accumulate on the bristles of the toothbrush, and sharing that brush can spread diseases. If you share toothbrushes it’s also possible that you are sharing bacteria, which makes you susceptible to all sorts of bacteria and diseases.
Along with not sharing a toothbrush, you should also avoid sharing the same holder for your brushes. Keep your brushes a few inches apart to avoid bacteria transfers.

Deep Cleaning
Besides rinsing your toothbrush with hot water after each use, you should deep clean the brush at least once a week. Use one of these four treatment methods to make sure your toothbrush is ready for its next use.
- Antibacterial mouthwash: Stir your toothbrush in a cup of mouthwash for 30 seconds.
- UV sanitizer: Using UV light, the sanitizer takes approximately 5 minutes to thoroughly disinfect your toothbrush.
- Disinfecting solution: Combine 1 tsp of peroxide with 1 cup of water. Soak your brush for 15 minutes or swish it in the solution, and then rinse with hot water. You can also store your toothbrush in a cup of hydrogen peroxide, just be sure to replace it daily.
- Boil: Though hard on your toothbrush, boiling it for 3 minutes will kill most microorganisms.
Cleaning an Electric Toothbrush
Cleaning an electric toothbrush is much like taking care of any other toothbrush. First, rinse the brush under hot water to clear off any debris or toothbrush that may be leftover. Then separate the toothbrush head from the handle, and rinse both separately.
Be sure to run water inside of the toothbrush head, as saliva and toothpaste can easily build up inside. Wipe down and air dry all parts before reassembling the brush.
If you notice a buildup of gunk or debris on your electric toothbrush, use a washcloth dipped in hydrogen peroxide to clean it off.

Replacement Time
Even if you take great care of your toothbrush, there comes a time when you’ll have to replace it. The bristles will become worn and frayed, leaving the toothbrush ineffective at properly cleaning your teeth.
Manual Toothbrushes
You should replace your toothbrush every 3 to 4 months, though it may need to be replaced sooner depending on external factors such as sickness or bad smells. If your teeth begin to feel fuzzy after brushing, not smooth like glass, then you should replace your brush immediately.
Toothbrush Heads
Your toothbrush head should also be replaced every 12 weeks. Unlike manual toothbrushes, electric toothbrush heads often have shorter bristles that can become worn down or discolored quicker.
Electric Brushes
Electric toothbrushes offer superior plaque removal and cleaning power than regular toothbrushes, but they too come with a lifespan. They typically have a lifespan of 3 to 5 years, at which point you will have to invest in a new toothbrush.
Taking care of your oral health means taking care of your toothbrush, but it also means visiting the dentist regularly! If you need to schedule your next dental checkup or have further questions about proper toothbrush care, don’t hesitate to reach out to Clock Tower Dental today!